


You've re-torqued every bolt on the rack twice. It's still there — that faint metallic tick over every bump, or the low rattle that shows up right around 55 mph and disappears below it. Most advice on this stops at "check your bolts," which works about a third of the time and leaves everyone else convinced their rack is just defective. It usually isn't. The noise is almost always coming from somewhere specific, and finding it is a process of elimination, not a guess.
Short answer: bed rack rattle comes from one of four places, in order of how often each one is actually the cause — loose mounting hardware, play at the stake pocket or clamp itself, a roof top tent or accessory rocking independently on its own mount, or the bed liner shifting under the rack's feet. Work through them in that order and you'll almost always find it before you reach the bottom of the list.

Search around for rack noise fixes and most of what comes up is written for roof racks — crossbar positioning, twisting your tie-down straps, adding a wind fairing. None of that applies here. Roof rack noise is mostly an aerodynamic problem: wind hitting bars and straps at highway speed and setting up a whistle or hum. A bed rack sits low, inside the bed walls, mostly out of direct airflow. Its noise is almost always mechanical, not aerodynamic — metal-on-metal or metal-on-plastic contact that wasn't there when everything was freshly torqued, now showing up as play under the repeated jolt of normal driving.
That distinction matters because it changes where you look. A wind fairing won't fix a loose stake pocket bracket, and twisting a strap won't quiet a roof top tent that's developed play at its own mounting bolts. Treat this as a mechanical diagnosis, not an aerodynamic one, and you'll skip a lot of wasted effort.
It also explains why the noise tends to get worse over time instead of staying constant. Wind noise is usually consistent the moment you hit a given speed — it's the same airflow hitting the same surface every time. Mechanical play compounds: a tiny bit of clearance lets a component move slightly, that movement wears the contact surface a little more, which creates a bit more clearance, and the cycle continues. That's why a rattle that started as a barely-noticeable tick after a long trip can turn into something much more obvious within a few months if it's never addressed.
Work through these in order. Each one is more likely than the next, so there's no reason to jump to step four if you haven't ruled out step one.
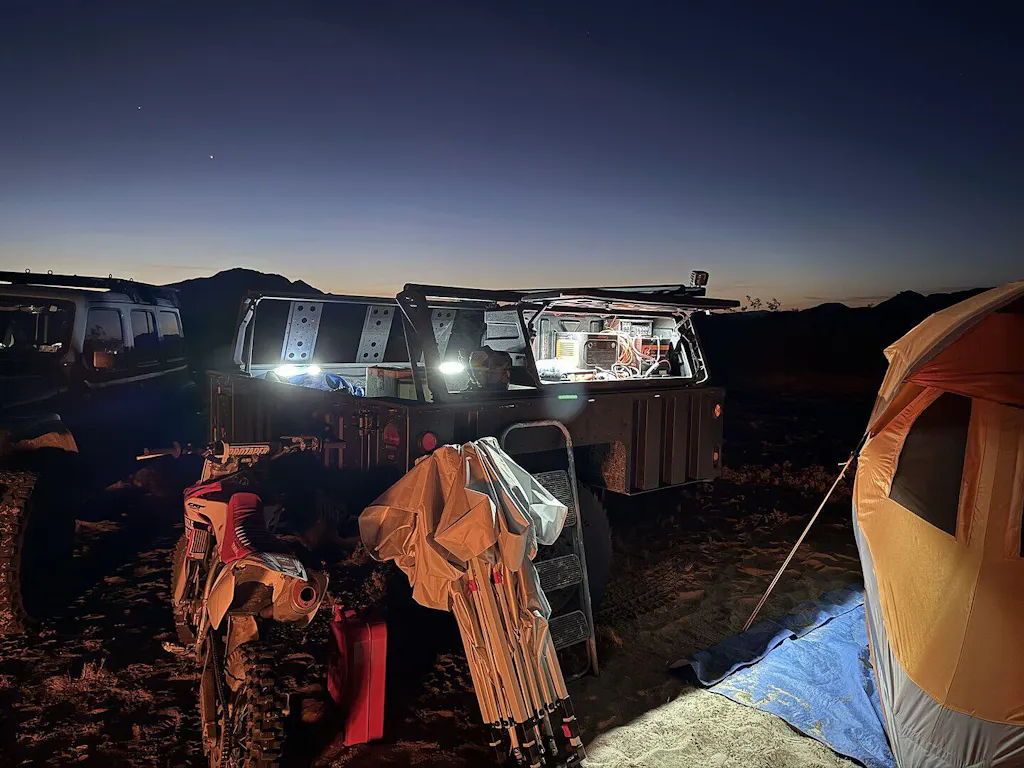
Use a torque wrench and your rack's specified value — typically in the 20–25 ft-lb range for most bed racks, but check your manual. Work in a cross pattern: front-left, then front-right, then rear-left, then rear-right, tightening each one partway before moving to the next rather than fully torquing one bolt before touching another. This keeps the rack settling evenly instead of cocking slightly to one side as you go. Over-torquing is its own problem — it can crush bed rail caps or strip threads, which creates a worse rattle than the one you started with.
If torque alone doesn't fix it, the bracket-to-pocket fit has likely opened up slightly — common after enough cycles of load and vibration. A thin rubber or felt shim between the bracket and the pocket wall takes up that clearance without forcing anything. For clamp-on mounts, check whether the clamp's rubber or felt liner has compressed or worn thin; replacing it restores the snug fit that prevents the bracket from shifting under bump-load.
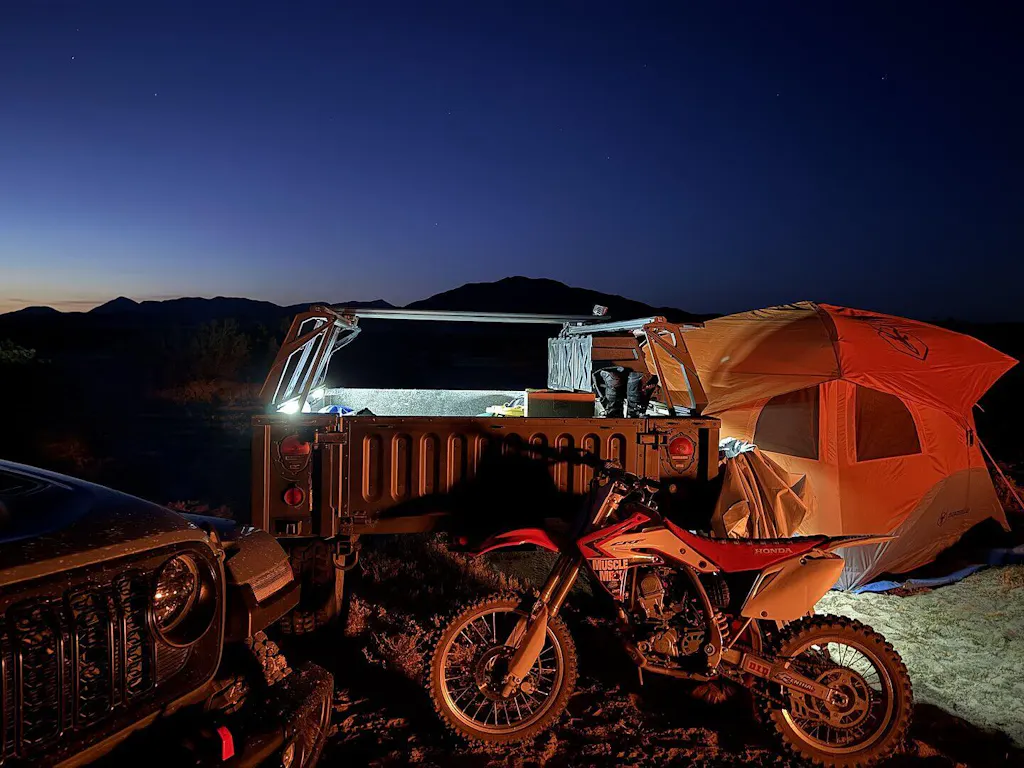
Test this directly: with the truck parked, grab the RTT or accessory and rock it by hand, independent of the rack. If it moves at all, that's your source — even a small amount of play there can produce a rattle that sounds like it's coming from somewhere else entirely once you're driving. Re-torque the tent or accessory's own mounting hardware first. If it still has play after that, a thin rubber isolator pad between the tent's base and the rack's crossbars absorbs the vibration that bolts alone can't eliminate.
Check whether the liner sits snug against the bed rails and floor, particularly right under each of the rack's mounting feet. If there's any give, a strip of foam tape along the contact edge takes up the gap and stops the liner from shifting under the rack's weight when you hit a bump.
It's common to fix the loudest source and discover a second, quieter rattle underneath it that was being masked the whole time. If you fixed your top diagnostic-order suspect and the noise changed character — got quieter, or shifted to a different pitch — rather than disappearing completely, don't assume you guessed wrong. Go back through the list a second time. Most multi-source rattles get solved in two passes, not one.
| Symptom | Most Likely Cause | Fix | Time Needed |
|---|---|---|---|
| Rattle started recently, rack is fairly new | Mounting hardware settling and loosening | Re-torque every bolt in a cross pattern | 10–15 min |
| Rattle persists after re-torquing | Play between bracket and stake pocket or clamp | Add a rubber or felt shim to close the gap | 15–20 min |
| Noise seems to come from above the rack | RTT or accessory rocking on its own mount | Re-torque accessory hardware; add isolator pad if needed | 20–30 min |
| Noise only over rough sections, not smooth highway | Bed liner shifting under rack feet | Foam tape along liner-to-rack contact points | 10 min |
Answer a couple of quick questions and we'll point you to the most likely cause.
Pick the one that matches best.
Does the noise seem to come from the rack frame itself, or from something mounted on top of it?
After any fix, rock-test the spot you worked on by hand before you drive anywhere — you're confirming the play is actually gone, not just quieter for a moment. If you addressed an accessory or RTT, rock-test that separately from the rack frame, since the two can have independent issues. Then drive a short loop that includes the same rough stretch where you first noticed the noise. If it's gone, drive another 50 miles and recheck everything you touched — settling can reveal a spot you missed on the first pass.
Move to the next item in the diagnostic order — stake pocket or clamp play. Torque only fixes loose hardware; it can't close a gap that's developed in the fit between the bracket and the pocket or rail.
Not always, but it's more common than with a bolt-through mount, since the bracket relies on a snug fit inside the pocket rather than a fixed through-bolt connection. A shim or liner replacement usually resolves it without needing to switch mounting types.
If the tent is properly torqued and isolated, you shouldn't need to. If you've already tried re-torquing and adding an isolator pad and it's still rattling, removing it for long highway stretches is a reasonable temporary workaround while you track down the exact cause.
Loose components often have a resonant frequency — a specific speed where road vibration matches the natural frequency of whatever's loose, amplifying the noise. Below or above that speed, the same looseness can be much quieter or silent.
Yes — tailgate latches, spare tire mounts, and exhaust heat shields are common unrelated sources of bed-area rattle. If you've ruled out the rack, its accessories, and the liner, it's worth checking these before assuming the rack is still the culprit.
Every 500 miles or before any extended off-road trip is a reasonable interval. Vibration and load cycling can reintroduce play over time even after a successful fix.
Work through this order before assuming the worst:
If your rattle traces back to mount-type play, our stake pocket vs. bolt-through comparison breaks down which mounting method holds up better long-term. Or browse bed racks built for your truck. If you're still shopping and want the full picture before you buy, see our bed rack decision framework for how mounting choice affects long-term stability.


Leave a comment